Group Assignments
Each pixel can be assigned to a group. Machine learning filters may then use the assignments during their training process. For example, when a distance classifier is used, it will use the pixels assigned to individual groups as the reference data to compare against.
In addition to groups that the user can define themselves, a pixel may have one of the following assignments:
Ignored due to invalid data: if the pixel’s input data contained any
NaNvalues, the pixel will have this assignment, and this cannot be changed by the user. Pixels withNaNvalues in the data themselves will be ignored by selection tools by default, and only the Select all of button in the All groups list can select these pixels.Ignored by user: the user can choose to mark specific pixels as to be ignored. This is useful if the recording the user has made contains a measurement artifact they want to ignore for further data analysis. Pixels that are ignored in this manner are replaced by
NaNartificially before they are propagated through the model.Not assigned: this is the default state of a pixel and indicates that the pixel
Background: fluxTrainer always has an implicit group named Background defined that is used for the purpose of indicating that specific pixels belong to the background. Some filters will automatically take this implicit group into account.
Warning
This implicit group will be removed at some point in the future, once all relevant filters have been updated. Projects that still use this implicit group will then automatically be converted when they are loaded.
The image view has a mode that overlays colors on top of the underlying grayscale image to indicate to the user which pixels belong to which group according to the color of the group.
Assigning Pixels To Groups
To assign pixels to a group first open up the Group Assignments dock widget:
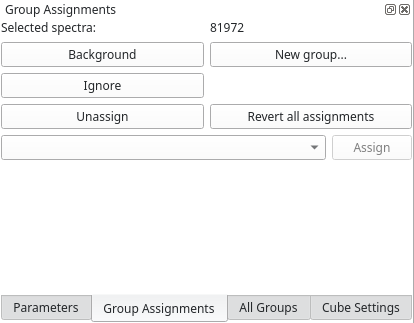
At the top it will show how many pixels the user has selected with the current selection.
The Background button assigns the pixels belonging to that selection to the implicit background group (see above).
The Ignore button marks these pixels as to be ignored. Ignoring a
pixel means that its data will be replaced by NaN before it is
propagated through the model.
The Unassign button removes any previous assignments of the currently selected pixels.
The Revert all assignments button removes any assignments of all pixels.
The New group… button will open a window to allow the user to create a new group and assign the selected pixels to that group. (See below for details.)
At the bottom the user can select from a list of existing groups:
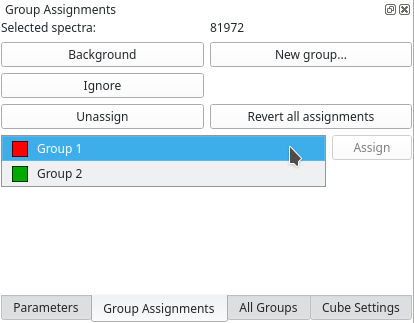
and then click on the Assign button to assign the selected pixels to an existing group.
After changing any assignment fluxTrainer will redo all training and analysis steps up to the current point.
Managing Groups
To manage groups the All Groups dock widget is available:
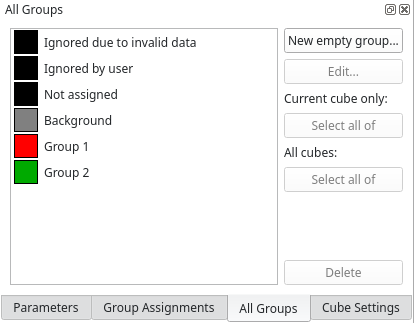
On the left the user has a list of all groups, plus all four implicit assignment states a pixel can have. On the right the user can select the action they want to take.
Clicking on the Select all of button beneath the text Current cube only will replace the current selection with all pixels belonging to the group / assignment state that was selected in the list, but only those of the current cube.
Clicking on the Select all of button beneath the text All cubes will replace the current selection with all pixels belonging to the group / assignment state that was selected in the list, but across all loaded cubes. (If only one cube is loaded, both Select all of buttons will behave identically.)
The Delete button allows the user to delete a user-defined group.
The New empty group… button allows the user to create a new group. A group created with this button will have no pixels assigned to it by default. (To create a group and immediately assign the current selection, use the New Group… button in the Group Assignments dock widget, which will open the same window, but also assign the selected pixels, see the previous section.)

The user must specify a name for the group they want to add. While it is not required, it is strongly recommended that the names of all defined groups are chosen to be unique.
Below the name the user can specify a color for the group. Clicking on the … button will open a window that will allow the user to pick the color. (How the window looks like will depend on the operating system fluxTrainer is running on.)
Finally there’s an area for settings related to the group. Some filters will have settings that may be specified individually for each group. When editing the parameters of an individual filter, a list of all defined groups will be shown. This list is the reverse view of that: for a specific group the user can decide upon the settings they want to specify for all filters that have group-dependent parameters.
Finally, the Edit… button in the All Groups dock widget will open the same window as the New empty group… button, but in this case the settings of an existing group can be changed.