Setup
Requirements
The .NET API of fluxEngine requires at least .NET Standard 2.0. Some features may only be available with newer .NET versions.
The .NET API of fluxEngine is tested on Windows with a x64 CPU.
Using nuget to install fluxEngine’s .NET API
LuxFlux provides nuget packages for fluxEngine’s .NET API. This provides an easy integration with Microsoft Visual Studio.
To make use of the package, right-click on the Dependencies
element of the .NET project that should make use of fluxEngine,
and select Manage NuGet Packages....
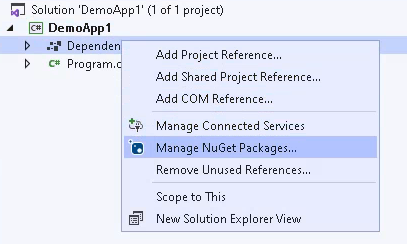
This will open the NuGet package manager for that project.
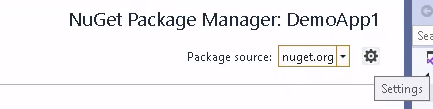
The first time fluxEngine is to be added to a specific LuxFlux
project, an additional package source needs to be configured. Click
on the settings icon next to Package source...:
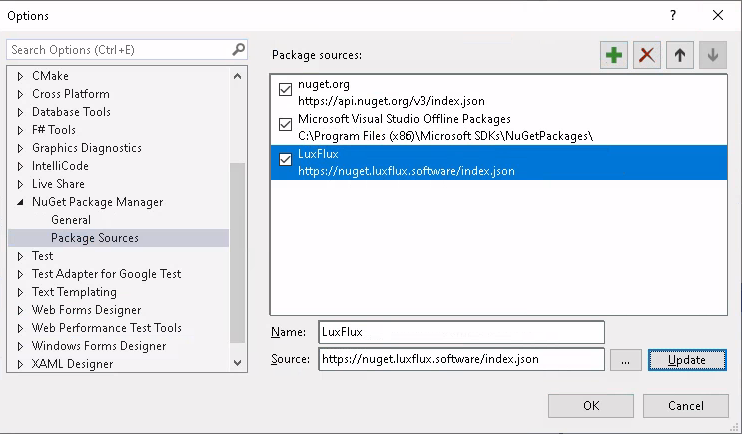
This will open the settings for the package manager. There add a new package source for the LuxFlux packages. Choose a descriptive name (such as LuxFlux) and use the URL
https://nuget.luxflux.software/index.json
as the package source (don’t forget to click on the Update button):
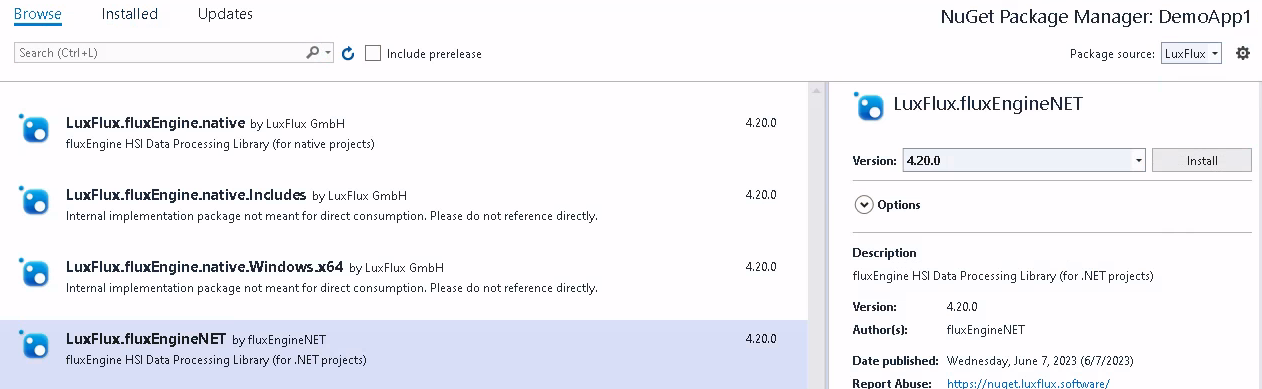
Then close the dialog with Ok and in the list of package sources, select LuxFlux, and select choose the Browse tab to view all available packages:
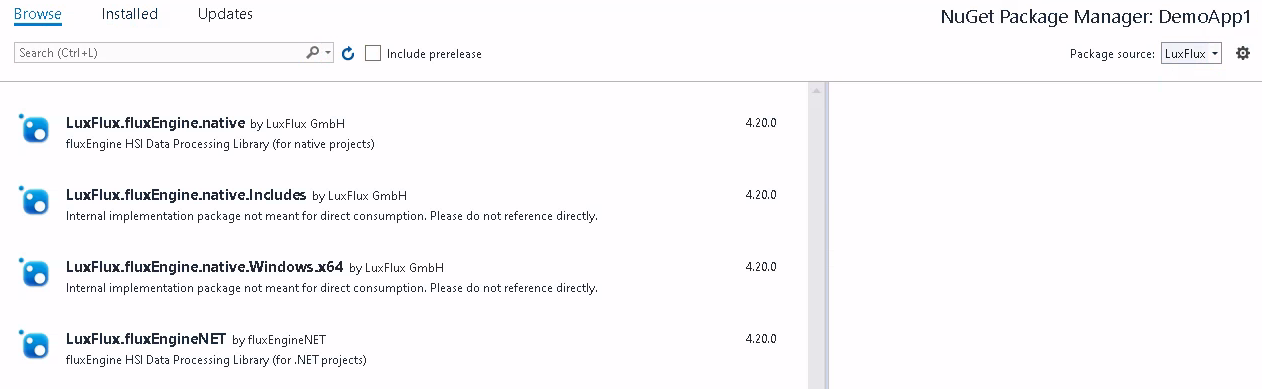
Select the package LuxFlux.fluxEngineNET for the .NET API for
fluxEngine, and then click on the Install button:
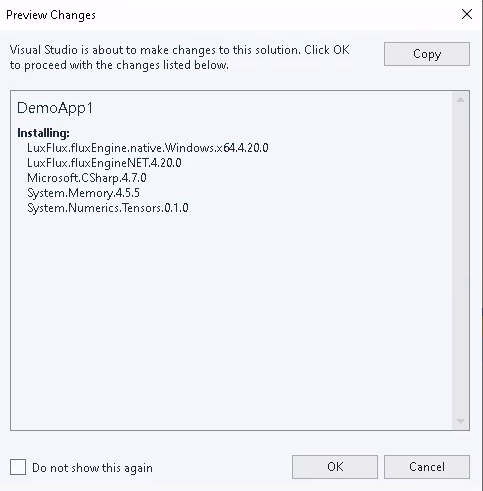
Visual Studio will now download the package together with all of its dependencies (this may take a while, depending on the internet connection), and then show a dialog asking the user for confirmation they want to add the package as a dependency of the current project:
After that the LuxFlux.fluxEngineNET package will exist as a
dependency of the current project and can immediately be used for
software development.
Simple Test Code
The following simple test code may be used to verify that fluxEngine indeed works with the project:
Console.WriteLine($"Using fluxEngine version {LuxFlux.fluxEngineNET.Version.String}");
Package Contents
The package contains the .NET assembly fluxEngineNET.dll that
contains the .NET API.
It also references a native NuGet package
LuxFlux.fluxEngine.native.Windows.x64, which contains the
actual implementation of fluxEngine for Windows on x64 CPUs. That
package consists of the following files:
In
runtimes/win-x64/nativevarious DLLS and an executable that are the implementation of fluxEngine as well as its third-party native dependencies. (These are the same files that are also part of the native fluxEngine ZIP package.)In
licensesthe licenses of the third-party dependencies.
Visual Studio will automatically copy the files in
runtimes/win-x64/native next to the executable that is being
built, so they can be found by the .NET API. When deploying
fluxEngine the user should take care to also install the native
runtimes in the correct directory, as well as the third-party license
texts.
Note
The fluxDriverIsolation.exe executable that allows fluxEngine
to talk to drivers is included in the NuGet packages, but
the drivers for individual cameras aren’t. These still need to
be downloaded and deployed separately.